


The light triggered water level controller circuit discussed the following post carries the good thing about being corrosion free and considerably trustworthy rather than the traditional moisture sensor type of water sensors.
One slight problem with this LDR based sensor is that the tank interior usually ought to be activated by some form of light source for instance a bulb or a LED.
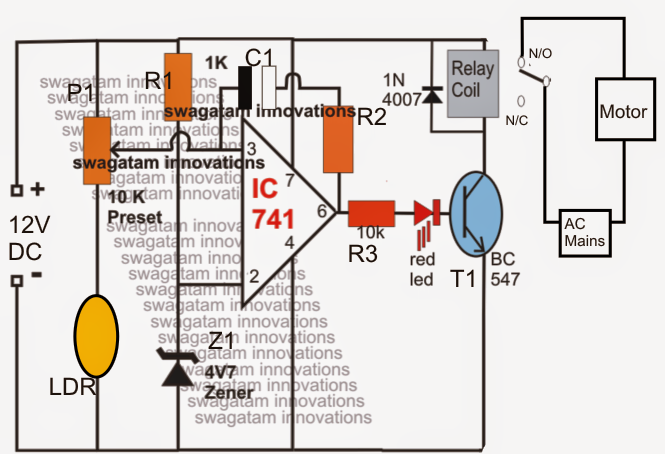
A LDR sensor is designed with a IC 741 opamp and changed thoroughly such that the light falling over the LDR continues the pin3 of the IC low in accordance with a targeted light source and with use with pin2 set voltage.
In an occasion the light across the LDR is disrupted, persuades an disturbance across the pinouts of the IC activating the opamp output to go high and trigger the hooked up relay and the load.
In the current light triggered water level controller circuit, an LDR is employed and located across the the area of the tank where the level is intended to be supervised, or a relay is intended to be turned on in accordance with a rise in the water level.


Providing you will discover an lack of water across the sensing zone, the LDRs go through the incident light (situated from the opposite side, inside the tank) which usually continues pin3 of the IC low, on the other hand when water begins rising and will probably cover the LDR in the path, reverts to a high at pin3 of the IC which instantaneously guides the opamp output to go high starting the relay and the pump.
A hysteresis control feedback resistor across the opamps (R2/C1)) make certain that the once the scenario is imagined it keeps latched for a few certain time as well as the pump motor is in a position to drive until the water has achieved the bottom of the tank. The time for which the opamp continues latched could be dependent upon adjusting the feedback resistor hooked up between the output and the input pins of the opamp.