So now we already know that we can use a solenoid for generating free electricity from walking. But what happens if tuning and optimizing the solenoid does not work well or maybe it is not giving enough current. Then no problem at all. We have another idea that can work even better and that is by using a cranked flashlight mechanism.
How a Cranked Flashlight Works
Now we all have seen those flashlights that do not need a battery right. Those flashlights work when we crank a small handle on the side and then the light comes on. But how does that happen.
Inside those flashlights there is a spring-loaded motor and a gear system. When we turn the crank by hand then it forces the gears to rotate and these gears are designed in such a way that they make the motor shaft spin many times faster than our hand movement. This fast spinning of the motor then generates electricity and then that electricity powers the flashlight instantly.
Using the Same Idea in Shoes
So now if this cranking system can generate electricity for a flashlight then why not use the same method in our shoes. The idea is simple.
We take a small cranked flashlight mechanism.
We remove the LED section because we do not need the flashlight part.
We only keep the motor and gear system that generates the electricity.
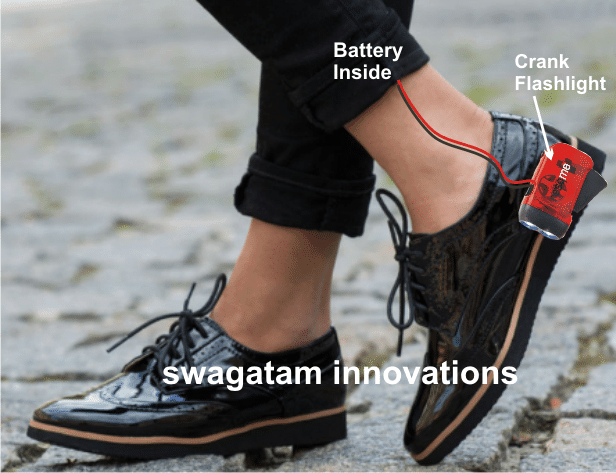
We install this setup inside a shoe in such a way that when we step and apply pressure then the mechanism gets cranked automatically.
The output wires from the mechanism are then connected to a small rechargeable battery so every time we walk then the mechanism keeps cranking and keeps charging the battery.
How the Cranking Will Work in a Shoe
Now in a flashlight we crank the gear with our hand but in a shoe we cannot do that right. So we need to find a way to make the cranking happen automatically when we walk.
One possible way is:
We attach the cranking lever to the heel or sole of the shoe.
When we step down then our weight pushes the lever and then that forces the gear to turn.
When we lift our foot then a small spring pulls the lever back to its original position.
So with every step then the gear keeps moving back and forth cranking the motor continuously.
Since we walk thousands of steps in a day then this mechanism will keep working non-stop generating free electricity and storing it in the battery. Later we can use this stored power for charging a cellphone small LED lights or any other small gadget.
Advantages of This Method
No Extra Effort Needed The mechanism works automatically while we walk so we do not have to do anything extra.
More Efficient Than Piezoelectric Unlike piezo materials that generate very tiny electricity this method can produce a good amount of current.
Simple and Reliable No complicated circuits are needed. It is just a mechanical setup with a small motor and gears.
Can Work in Any Shoe We can fit this inside any regular shoe with some modifications.
How We Can Build This Shoe Electricity Generator Step by Step
So now we are going to see how we can actually make this thing inside a shoe so that whenever we walk then this mechanism keeps cranking and keeps generating electricity. The process is not too difficult but we have to do it carefully so that the shoe remains comfortable and the mechanism works smoothly without any trouble.
Step 1: First We Need to Collect All the Required Parts
Now before we start making anything we first have to get all the parts that we need. These are the things that we must have.
- A cranked flashlight mechanism – We only need the motor and the gear system inside this. We do not need the LED or the casing so we can remove those.
- A small rechargeable battery – A 3.7V lithium-ion battery will work well.
- Thin but strong springs – These will help in bringing the lever back after every step.
- A strong but flexible lever – We can use a plastic or metal strip for this.
- Thin insulated wires – We will need these to connect everything properly.
- Adhesive and strong tape – To fix the parts securely inside the shoe.
- A comfortable shoe – It is better if the shoe has a thick sole because then we can install the mechanism properly inside it.
Step 2: Opening the Flashlight and Taking Out the Mechanism
- We have to carefully open the cranked flashlight using a screwdriver.
- Inside the flashlight we will see a motor and a gear system.
- Now we have to cut and remove the wires that go to the LED because we do not need the LED.
- We must keep the motor and the gear assembly carefully because this is what we will install inside the shoe.
Step 3: Getting the Shoe Ready for the Setup
- We must pick a shoe that has a thick sole or some space inside where the mechanism can fit properly.
- But if the sole is too thin then we can attach an extra layer at the bottom to create enough space for the motor and the lever.
- Then we must make a small slot at the back near the heel where we will place the motor.
Step 4: Fixing the Cranked Flashlight Motor Inside the Shoe
- Now we take the motor and place it inside the slot near the heel so that it stays fixed and does not move around.
- Then we can use strong glue or screws to hold it tightly in place.
- We must make sure that the gear shaft of the motor is slightly exposed because we need to connect the lever to it.
Step 5: Attaching the Lever to the Heel of the Shoe
- Now we have to take a small strip of plastic or metal that will act as the lever.
- One end of this lever must be attached to the heel of the shoe using a small hinge or a flexible joint so that it can move easily.
- The other end of the lever must touch the motor’s gear system properly.
- Then whenever we step down then the heel will push the lever and that will turn the gear system.
Step 6: Adding a Spring to Reset the Lever After Every Step
- We must attach a small spring between the lever and the shoe.
- Now when we step down then the lever will push the gear and make the motor spin but when we lift our foot then the spring will pull the lever back to its original position.
- So with every step then the lever will move back and forth and the motor will keep spinning again and again.
Step 7: Connecting the Battery for Storing the Electricity
- We must take a small rechargeable battery and place it inside the shoe in a comfortable position where it will not disturb us while walking.
- Then we must connect the two terminals of the battery to the output wires of the motor.
- A diode must be used in series to stop the current from flowing back into the motor.
- Now whenever we walk then the battery will keep storing the electricity that is generated.
Step 8: Making the Final Adjustments and Testing Everything
- Now we must walk around and check if the whole setup is working properly.
- But if the motor is not cranking properly then we may need to adjust the lever position.
- But if the battery is not charging then we must check all the wire connections.
- So after making sure that everything is working well we must also make sure that the shoe is still comfortable to wear.
Conclusion
So now we saw another simple but powerful way of getting free electricity while walking. If a solenoid does not give enough current then we can try this cranked flashlight mechanism method which uses a motor gears and a simple pressing action inside the shoe. Every step we take will then generate free power and then we can use it for charging a battery which can later be used for different purposes.
This method is more powerful than piezoelectric materials and easier to implement compared to complex dynamo or motor setups. So if you want to create free energy just by walking then this is one cool and practical idea to try.
Important Warning Regarding Battery Safety
Now one very important thing we must understand is that this circuit does not have an overcharge protection system. This can be dangerous for the battery if we keep walking for too long and keep charging it without any limit.
But nowadays Li-ion cells usually come with built-in PCMs (Protection Circuit Modules). These modules make sure that the battery is completely safe by stopping any overcharging or over-discharging.
So before using any Li-ion battery in this setup we must check and confirm that it already has a PCM attached. If the battery has this module then we can safely charge it using this method without worrying about overcharging problems.
Hello,
I want to communicate about an electronic device. Please contact me if you want…
Best regards,