So in this post we are explaining that how we can make a simple solar electric rickshaw or E rickshaw circuit which anybody can try building at home easily, then use that with some locally made vehicle. Now this idea was actually requested by one person Mr. Richard Cameron.

The Design Concept
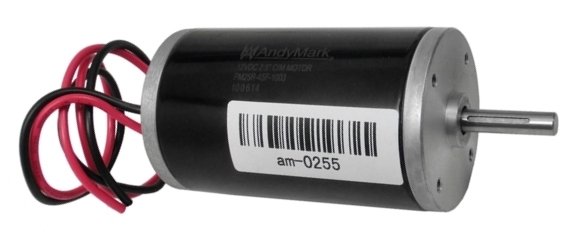
So now we are talking about how to select that right motor BLDC or something else.
Now in one of my earlier posts we already saw that one idea where we used a BLDC motor along with its necessary circuit to make an electric scooter and that method was working quite well.
But here in this post we are discussing something similar but this time we are not using BLDC motor just to keep things very simple.
Then somebody may think that if we use an ordinary brushed motor instead of BLDC then that might not be so efficient, right? But still a brushed motor can be a much better choice because then we do not need to use that complicated BLDC driver circuit or deal with complex wiring connections. So now because of that the design becomes extremely simple and any ordinary person can try making it without much effort.
So now we have one more big advantage. That is, if we use that brushed motor then we can easily control it with just some normal IC 555 PWM circuit, right? But if we use that BLDC motor then we will need some highly advanced control ICs.
Now these advanced ICs are not only difficult to find in the market but then there is also that big problem, after some years these ICs might stop being made because companies keep changing old ICs with new ones.
So if we use such an IC inside an E-rickshaw then later if it stops working then we will not find its replacement and that can completely ruin that whole warranty period of that E-rickshaw.
Using a IC 555 PWM Controller
So now we can simply use some normal PWM circuit with IC 555 and that will allow us to control the speed of the E-rickshaw by controlling that main motor speed.
Then because we are using PWM we can make sure that the motor does not waste too much energy. So this method saves a lot of power while also making sure that the motor runs with its best possible efficiency.
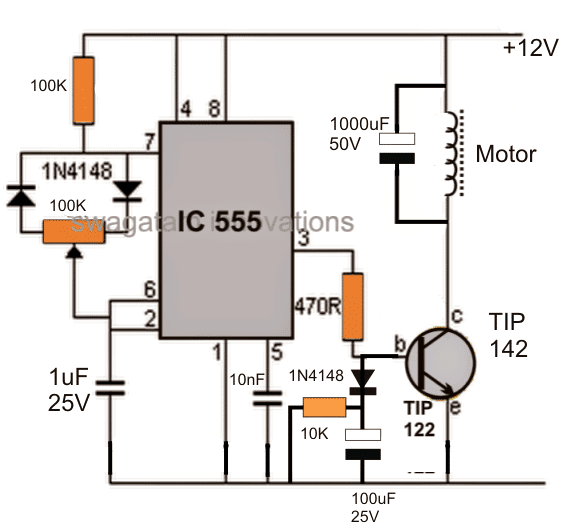
How the Circuit Works
So here we have that 100k potentiometer which is connected with those two 1N4148 diodes and this part is very important because it helps in adjusting that output pulse-width modulation (PWM) at pin #3 of the IC.
Now when we change this PWM then it controls how much that TIP142 transistor is conducting. And because that transistor is responsible for supplying power to the motor, this means that the PWM is directly controlling how fast or slow that motor is running.
But then if we need to handle more current then instead of using TIP142 we can replace it with some similar MOSFET which can manage that extra power without any problem.
Soft Start Feature
Now there is also that 100uF capacitor which is connected at the base of that transistor. This capacitor makes sure that when we switch ON the E-rickshaw, then the motor does not start suddenly with a jerk.
Instead it starts moving slowly and smoothly. This is very useful because it stops the motor from pulling too much power instantly and it also makes driving more comfortable.
Importance of Potentiometer Quality
It is very important that we use a really good-quality potentiometer here. This is because we will keep adjusting it again and again to control speed, right?
So if the quality is poor then after some time it may stop working properly and then we will not be able to control the speed smoothly. But if we use a strong and reliable potentiometer then it will work fine for many years without giving any trouble.
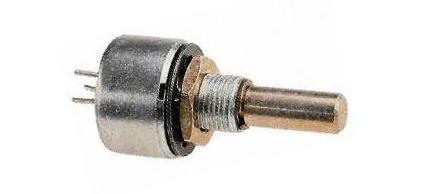
Typical Specifications of the Potentiometer
Now if we want that potentiometer to work well for a long time then it should have these important features:
It should be made from Cermet or carbon-molded material. These materials make sure that the pot does not wear out fast.
It should be approved by BS and CECC standards so we know that it is tested for good quality.
If it is a Cermet type then it should be able to handle 2 watts of power when the temperature is 70°C.
It must have a strong and tough body so that it does not break or get damaged easily.
It should follow military standard layout meaning it is designed for high durability and precision.
The outer case must be sealed as per MC1/MH1 standards so that dust or moisture does not enter inside and damage it.
The terminals must be stiff and silver-plated, which helps in making strong and long-lasting electrical connections.
So if we use a potentiometer with these features then we can make sure that our E-rickshaw speed control works smoothly for many years without any trouble.

How the Speed Control is Installed
Now for controlling that speed of the E-rickshaw easily we can fix that speed control pot knob right on the handle close to the driver’s thumb. This way the driver can increase or decrease the speed quickly without needing to move their hand much making driving very comfortable and effortless.
Then we must also place that ON/OFF switch of the circuit near the driver’s thumb on that same handle. This is very important because if there is any emergency or some sudden problem then the driver can switch OFF the system immediately without any delay preventing accidents or damage.
The Braking system
Now for braking we can use that normal method which is already used in most electric rickshaws. But we must add one extra push-switch in the braking system and this switch must be in series with that main supply voltage going to the motor circuit.
This switch must be wired in such a way that when the driver presses the brake then this switch must first disconnect power to the IC 555 circuit and the motor.
Because of this the motor will be switched OFF first before the braking system starts applying force on the wheel axle. This will make sure that the motor does not interfere with the braking making the stopping process smooth and safe.
Solar Panel Integration
Now if we want to make this E-rickshaw more power-saving then we can add a solar panel to the system and this will help in the following way.
Although that battery of the vehicle will still need to be charged from an AC mains charger regularly this solar panel will work as an extra backup charger. So when the vehicle is not being used then that solar panel will keep charging the battery slowly. This will reduce the amount of electricity needed from the main charger saving power and money for the user.
Solar Panel Placement and Rating
The best place to install that solar panel would be on the roof of the E-rickshaw. Since the roof is quite big we can install a panel that covers the whole roof area.
A good choice would be a 30V 5-amp solar panel. This is because this rating is not too expensive and it is also powerful enough to provide useful charging support to the battery.
Now the best part is that if we use this type of solar panel then we do not need any extra charge controller. This is because the solar panel’s voltage will automatically match well with that 24V battery making the whole system even more cost-effective and simple.
With this solar panel added the E-rickshaw’s battery will always stay topped up whenever the vehicle is not moving. This will help to improve the battery life and also increase the overall efficiency of the vehicle in a big way.
The Battery Spec
Now if we take a normal three-seater E-rickshaw with the driver then a 24V 20-amp motor should be good enough. This is just a rough guess but should work fine.
Then if we want to run this motor properly the whole day then a 24V 200AH battery should do the job. But if the user wants more or less backup then they can pick a different AH rating based on how long they need to run that rickshaw in one charge.
Leave a Reply