Making a high power LED flashlight circuit is simple. All you need is to gather the components and follow instruction to build the system.
This article has explained in detail [along with diagrams] the procedure to make a LED Flashlight:
Recommended Components
- 24 Super-bright LEDs
- 3 batteries [AA]
- Resistor to manage current flow
Procedure of Assembly

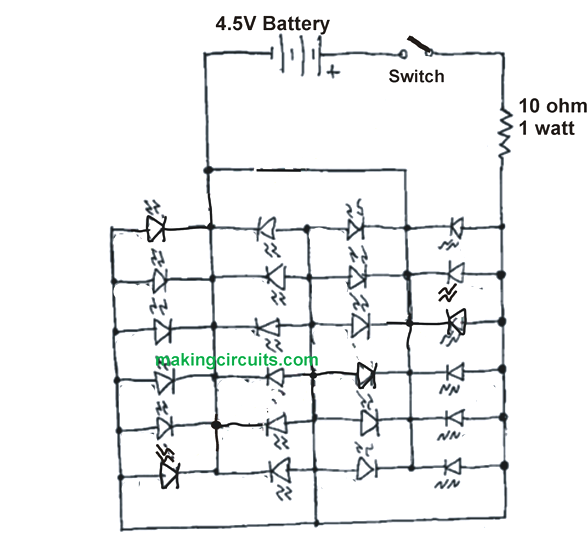
Fig 1.0: The circuit design shows the basic layout of the design.
Referring to the circuit diagram, all the 24 LEDs are attached together in parallel form. While the optimum voltage to generate bright light from the LEDs need 3.3 – 4 volt [Current – 20mA], but here the current use is 0.4 – 0.6A.
The circuit used in this demonstration is a 3 x AA 1.2 V along with nickel-metal hydride battery. A 1ohm resistor is used to limit the current supply to ensure the voltage remain 3.6V.
However, the assembly of the resistor and the LED is made on a PCB Board. Once the things are in place the next step is to solder the 1ohm resistor and the LED and further soldering other parts on the PCB.
The next and final part is to attach the PCB to the battery holder. You can use glue in this case.
If you are planning to use this high power LED flashlight circuit on steel-made cabinet or cars, you need to add a magnetic system.
Leave a Reply